A pantry doesn’t stay organized because you bought the “right” containers. It stays organized because the system is easy to follow on a tired Tuesday night. The goal is a setup that makes it obvious where things go—so you naturally put them back.
Below is the exact “store-like” method I use (and keep using) to maintain a pantry that doesn’t slowly drift back into chaos—plus a 10-minute weekly reset that actually fits real life.
Why most pantries fall apart (even after a perfect cleanout)
In my experience, pantries get messy for predictable reasons:
- No clear zones, so items land wherever there’s space
- Too many categories, so it’s hard to decide where something belongs
- Backstock mixed with daily-use, so you forget what you already have
- No reset habit, so small mess becomes a big one
The fix is simple: make the pantry function like a small grocery aisle—clear sections, front-facing priorities, and a quick weekly “restock check.”
Step 1: Do a fast reset (don’t overthink the purge)
You don’t need a dramatic makeover. Start with a 15–30 minute “functional reset.”
What I do:
- Pull everything out one shelf at a time (not the whole pantry at once unless you have hours).
- Toss obvious expired items and anything stale.
- Wipe the shelf quickly.
- Put items back by type, not by brand.
Tip from real life:
If you try to deep-clean every jar and label everything on day one, you’ll burn out. A pantry that stays organized is built in passes, not perfection.
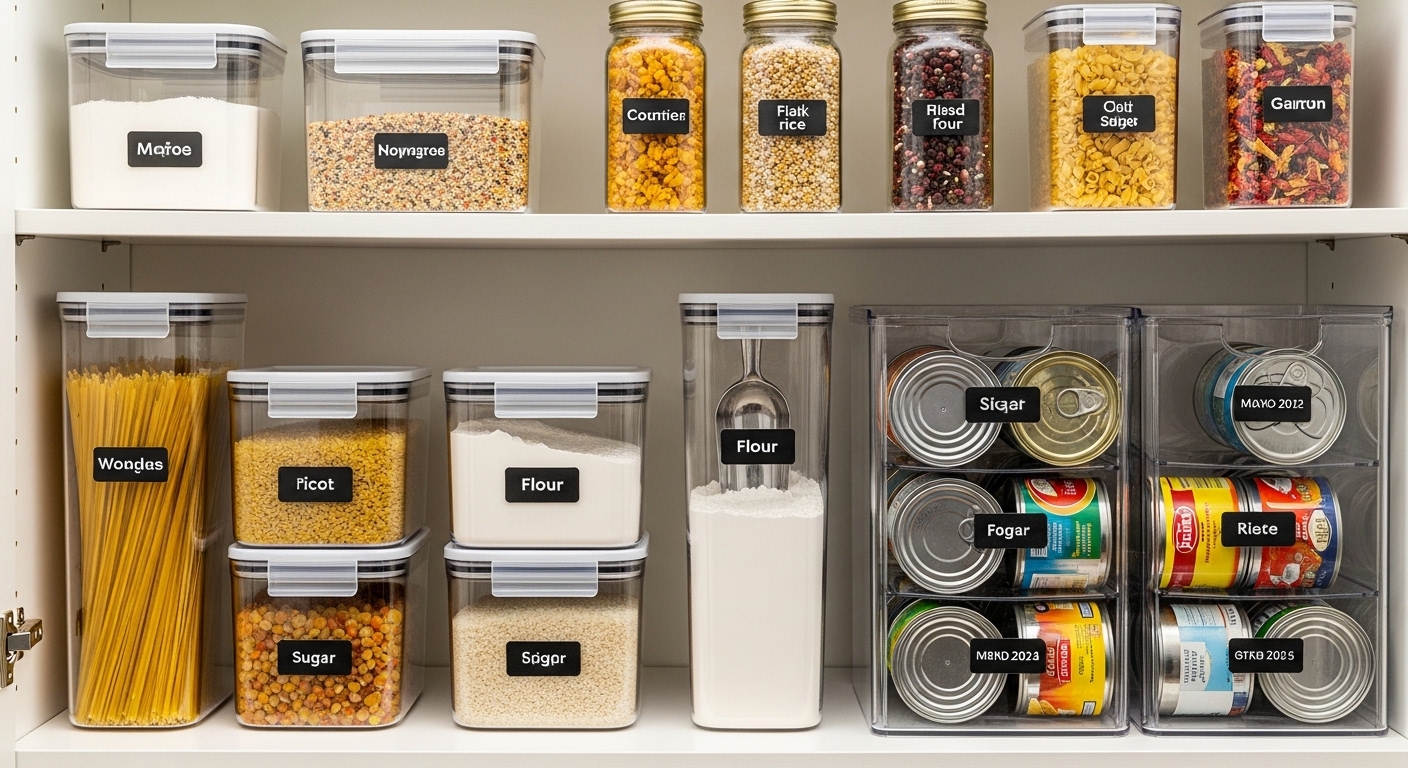
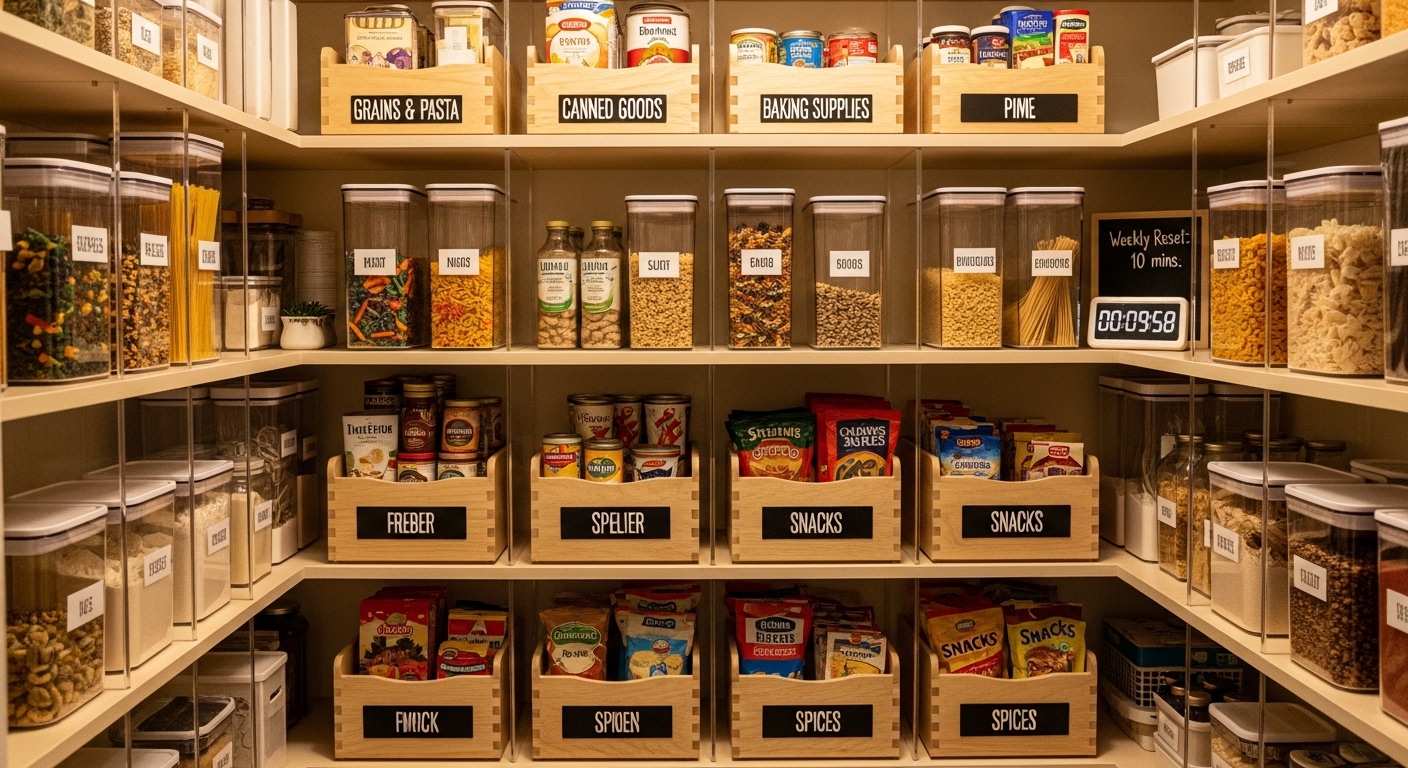
Step 2: Create “store-like” zones that match how you cook
The best zones are based on behavior, not ideal aesthetics. I recommend starting with 6–8 zones max.
The best pantry zones (steal this layout)
1) Breakfast Zone
Cereal, oats, granola, pancake mix, coffee/tea, sweeteners.
2) Snacks Zone
Chips, crackers, bars, fruit snacks, nuts, grab-and-go items.
3) Dinner Helpers Zone
Pasta, rice, noodles, sauces, canned tomatoes, broths.
4) Canned Goods Zone
Beans, tuna, soups, corn, peas—everything canned in one spot.
5) Baking Zone
Flour, sugar, chocolate chips, baking powder/soda, vanilla, sprinkles.
6) Oils + Vinegars + Cooking Basics Zone
Oil, vinegar, soy sauce, hot sauce, salt, pepper, spice basics.
7) Backstock Zone (the secret weapon)
Extra duplicates: spare sauce jars, extra pasta, bulk buys.
8) “Odd Stuff” Zone (1 small shelf/basket only)
If you don’t allow this, random items will spread everywhere. Limit it.
What changed everything for me:
Adding a dedicated Backstock Zone. Once duplicates had a home, the rest of the pantry stopped turning into a pile.
Step 3: Use shelf logic (the same way stores do)
This is what makes it feel “store-like” and easy to maintain.
The placement rules that actually work
- Eye level = daily use. Put your most-used items where you can grab them without thinking.
- Heavy items low. Cans, big bottles, bulk bags go on lower shelves.
- Rare use high. Party supplies, specialty ingredients, seasonal items up top.
- Kids’ items low (if applicable). Snacks where kids can reach reduces “pantry rummaging.”
A small trick that prevents mess
Keep “open and in-use” items in front, and duplicates behind or in backstock.
This alone reduces half-open bags and forgotten extras.
Step 4: Reduce visual chaos (without buying anything)
You can make a pantry feel 10x calmer with two habits:
1) Decant only what causes problems
I don’t decant everything. I decant the items that:
- rip and spill (flour, sugar)
- go stale fast (cereal, chips if you store them that way)
- attract pests (pet food, certain grains)
If it’s already stable in its packaging and doesn’t make mess, I leave it alone.
2) “One category, one home”
Every item type gets one primary home.
If chips live in two places, they will end up in five.
Step 5: Labeling that’s useful (not decorative)
Labels should answer one question: Where does this go back?
What I label:
- zone names (Snacks, Baking, Pasta/Rice, Backstock)
- any container that hides what’s inside
What I don’t label:
- everything individually
- anything I can clearly see and recognize
Experience note:
Over-labeling is a maintenance trap. If your system requires constant label updates, it won’t last.
The 10-minute weekly pantry reset (this is the real magic)
This is how you keep it organized without “redoing the pantry” every month.
Set a timer: 10 minutes
Do this once a week (or every other week if you’re low-usage).
Minute 1–2: Quick toss + return
- Put misplaced items back into the right zone.
- Toss obvious trash (torn boxes, empty bags).
Minute 3–5: Pull forward + face
- Pull front items forward so you can see what’s low.
- Line up cans/boxes like a mini shelf display.
Minute 6–8: Backstock check
- If a zone is low and you have duplicates, move duplicates forward.
- Keep backstock neat so you can see what you own.
Minute 9–10: Mini list
- Note 3–5 items you’re actually out of (not “maybe low”).
- That’s it—stop at 10 minutes.
Why this works:
Small resets prevent the slow drift into clutter. You’re fixing tiny problems before they become “I need a whole Saturday.”
Common pantry mistakes (and quick fixes)
Mistake: Too many micro-categories
Fix: Combine. “Snacks” is enough—don’t split into 12 snack subtypes unless you love maintaining it.
Mistake: Mixing daily-use with backstock
Fix: Separate duplicates. Backstock gets its own spot.
Mistake: Shoving items into empty space
Fix: If there’s no zone, it doesn’t belong there. Create one “Odd Stuff” zone with a strict size limit.
Mistake: Storing by brand, not by use
Fix: Group by purpose: breakfast, baking, dinner helpers.
A simple pantry layout for small spaces
If your pantry is tiny, use only these zones:
- Breakfast
- Snacks
- Dinner Helpers
- Cans
- Backstock (small)
Keep it minimal. Small pantries stay organized when the system is simple.
Final takeaway: the system that stays organized
A pantry stays organized when:
- zones match how you cook
- daily-use is easy to reach
- duplicates have a backstock home
- you do a quick weekly reset