Hooks, Bins, Mail Control, and Zero Morning Panic (A Real-Life System That Sticks)
Most morning chaos isn’t about being “disorganized.” It’s about not having a home for the things that move every day—keys, bags, jackets, shoes, mail, and that one permission slip you swore you’d remember.
A drop zone fixes this by turning your door area into a simple system: you come in, you drop items into their assigned spots, and tomorrow you grab them without thinking.
No products. No links. Just a practical setup you can build in an hour and keep tidy in minutes a week.
What a “Drop Zone” actually needs (4 parts)
A drop zone works when it handles four streams of daily clutter:
- Hang: coats, backpacks, dog leash
- Contain: shoes, hats, gloves, small stuff
- Control paper: mail, forms, receipts
- Launch pad: tomorrow’s essentials ready to grab
If you miss one of these, the mess leaks into the floor, the counter, or “the chair.”
Step 1: Pick the smallest area that still works
You don’t need a mudroom. You need a 2–4 foot zone near the main door.
Good spots:
- A wall beside the door
- The back of a closet door near the entry
- A hallway corner
- The side of a kitchen cabinet near the exit
Real-life rule:
Pick the place where stuff already lands naturally. Fighting habits is harder than organizing.
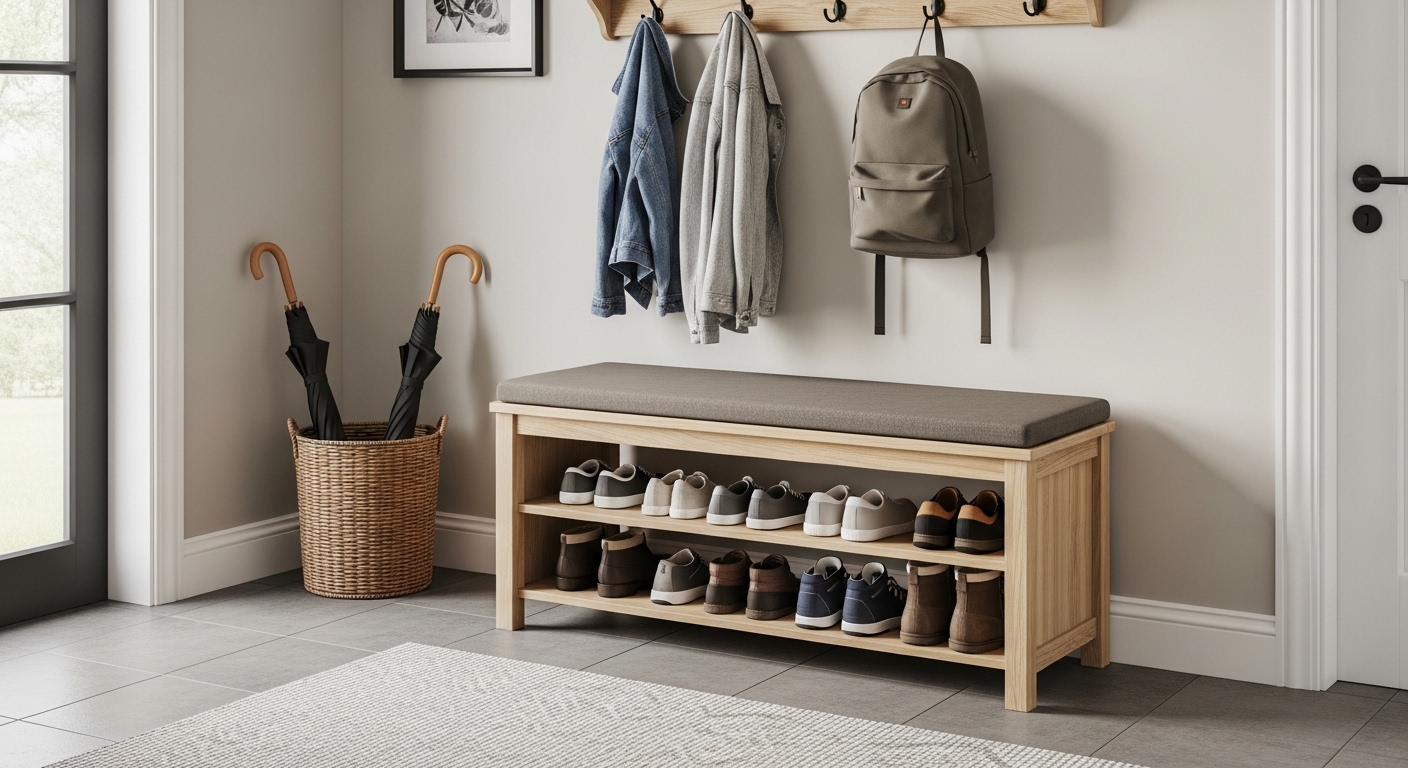
Step 2: Build the “Hang Zone” (the backpack problem solver)
This is the biggest clutter maker in most homes—bags and jackets.
What to include
- One hook per person (minimum)
- One “overflow” hook for guests or random items
- Hooks at two heights if you have kids (kid level + adult level)
How to make it work in real life
- Put the most-used hooks closest to the door.
- Keep heavy bags from swinging into the wall by giving each hook space.
- If coats constantly slide off, your hook shape/placement is wrong—move it slightly higher or give it more spacing.
Pro tip:
If you only add hooks but no bins/shoe plan, the area still looks messy. Hooks solve hanging clutter, not floor clutter.
Step 3: Add the “Shoe Zone” (without making it ugly)
Shoes are the #1 reason entryways look chaotic.
The simplest shoe rules (that families actually follow)
- Keep only daily shoes in the drop zone.
- Everything else lives in the closet/bedroom.
- Give shoes a boundary: a mat, tray, or defined shelf area.
Make it low-maintenance
- Add a wipeable mat so dirt stays contained.
- Keep the shoe area slightly separated from bags so it doesn’t feel like one big pile.
Real-life note:
If shoes don’t have a clear boundary, they drift. A boundary is more important than perfection.
Step 4: Create the “Small Stuff Bin” (gloves, sunglasses, chargers)
This prevents the classic “where’s my…” spiral.
What goes here
- Sunglasses
- Hand sanitizer
- Gloves/beanies
- Umbrella
- Reusable bags
- Dog bags/leash (if not on a hook)
The trick that keeps it tidy
Use one bin per category or one bin per person—don’t mix everything into one “junk tub.”
Simple label ideas:
- OUTDOOR
- DOG
- SCHOOL
- GRAB & GO
My experience:
If a bin becomes a junk drawer, it’s usually because it’s doing too many jobs. Split it into 2 bins and the problem disappears.
Step 5: Set up “Mail Control” (the paper that ruins everything)
Mail is sneaky. It looks small, then becomes a stressful stack.
The only mail system you need: 3 slots
- IN (mail arrives here—no sorting at the door)
- ACT (bills, forms, returns, things that need action)
- OUT (items leaving the house: returns, signed forms, outgoing mail)
The rule that makes it work
Sort mail once per day (or every other day) for 2 minutes:
- Trash/junk immediately
- Important goes to ACT
- Leaving-the-house items go to OUT
Pro tip:
If you keep “IN” too long, it becomes wallpaper. Keep it moving.
Step 6: Build the “Launch Pad” (zero morning panic)
This is what turns the drop zone from “organized” into life-saving.
What belongs on the launch pad
- Keys / wallet
- Work badge
- Water bottle
- Lunch bag
- Gym bag
- School papers that must go out
Best practice: make it visible
Morning panic happens when essentials disappear into drawers. The launch pad should be obvious.
Real-life trick:
Make the launch pad the only place you allow keys to live. It’s harsh, but it works.
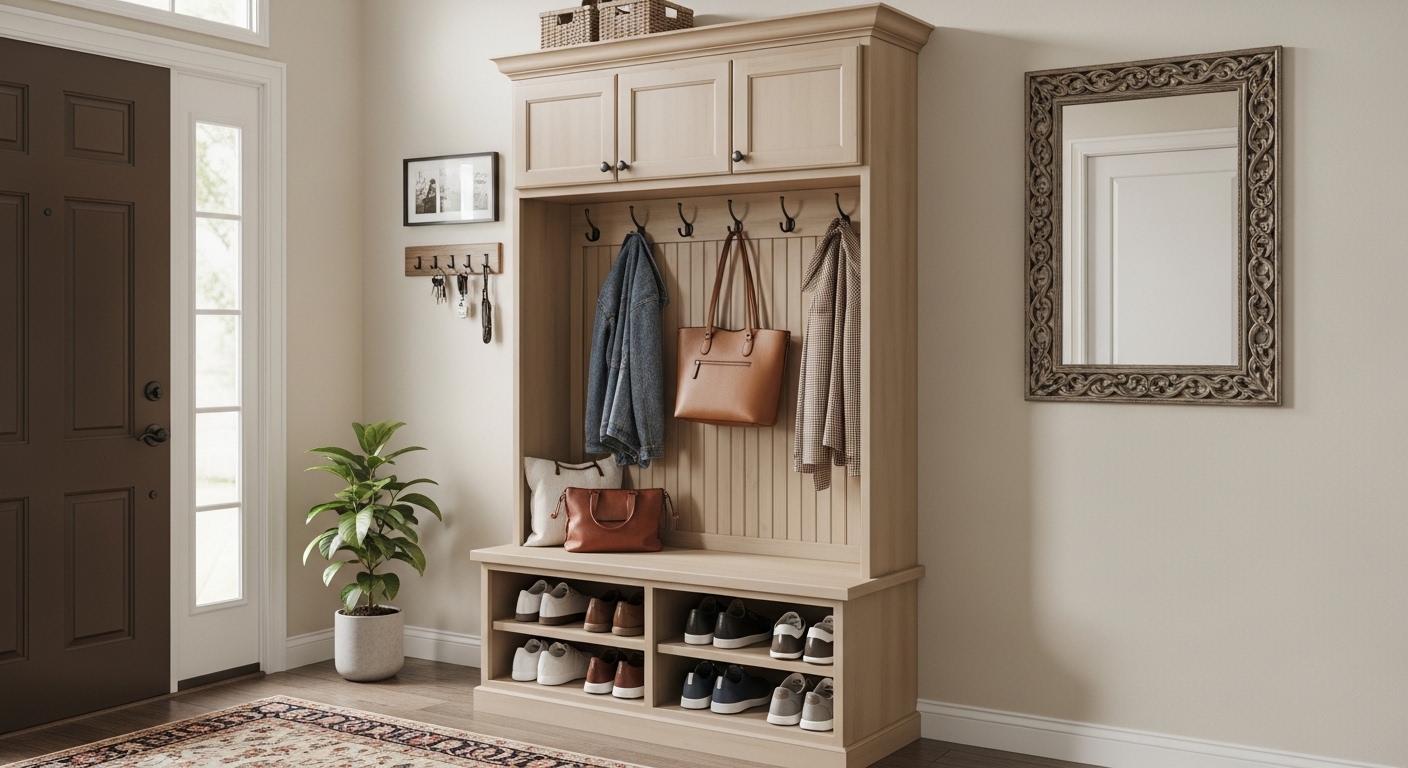
The best “Drop Zone” layout (copy/paste blueprint)
If you want a simple structure that fits most homes:
- Upper area (eye level): Hooks for bags + jackets
- Middle area: Small bins (by person or by category)
- Lower area: Shoe boundary (mat/tray/defined space)
- Side area: 3-slot mail control
- One dedicated surface/spot: Launch pad essentials
This layout reduces bending, keeps the floor clear, and makes the system feel natural.
How to keep it tidy (without becoming a chore)
A drop zone isn’t “set it and forget it.” It’s “set it and maintain it easily.”
Daily: 30–60 seconds
- Put items on hooks
- Toss shoes in the shoe zone
- Drop mail into IN
- Reset keys to the launch pad
Weekly: 10 minutes
- Empty the small bins (return stray items)
- Clear IN and ACT
- Wipe the shoe area + shake the mat
- Remove anything that doesn’t belong in the drop zone
My honest take:
The weekly reset matters more than the initial setup. A small reset prevents a big meltdown.
Common mistakes (and fixes)
Mistake 1: Too many decisions at the door
If you have to think, you won’t do it.
Fix: 4 parts only—hang, contain, mail, launch.
Mistake 2: No boundary for shoes
Shoes spread fast.
Fix: a defined mat/tray/area and only daily shoes allowed.
Mistake 3: Paper has no “out” route
Forms and returns pile up.
Fix: an OUT slot right next to the door.
Mistake 4: Drop zone becomes storage
When it turns into long-term storage, it stops working.
Fix: anything not used weekly moves away from the entry.
Final takeaway
A drop zone works because it matches real life:
- you come in tired
- you’re rushing out tomorrow
- you need a system that handles bags, shoes, paper, and essentials fast
Build the four parts, keep daily shoes only, use the 3-slot mail control, and protect the launch pad. That’s how you get a calmer morning without trying harder.